Guides
biz-settings
title: Introduction index: 1, sidebarDepth: 2
Introduction
Basic Profile: Basic settings include name, phone, address, photos.
Delivery: Delivery settings. Self delivery or 3rd party delivery (available in limited areas).
Hours: Operation hours for the business. Online order would only be allowed in the set hours.
index: 1, sidebarDepth: 2
Basic
Business Categories
We sort out businesses by categories on the homepage. You can add a business to all appropriate categories. For example, a pizza restaurant can be both American and Italian.
Business emails
You can set up a primary email address and multiple cc' recipients.
Business emails are used primarily in receiving information for online orders, reservations, etc. For example, when an online order is placed, an email would be sent to the primary email address and all the copied recipients.
There is no cost to using the email service or adding more copied recipients.
We also send important announcements to online ordering systems to all primary email addresses disregarding their notification setup.
Turn off notification
For a business using our POS system and receiving many online orders a day, it may receive overwhelmed emails a day. If this applies to you, you can turn off the email notification.
However, please always update the business hours promptly for holidays and special occasions. You don't want to keep the system on and let customers order online when no one is working at the restaurant.

meta:
- name: keywords content: Restaurant Hours, Holiday Hours, Special Event Hours
Hours
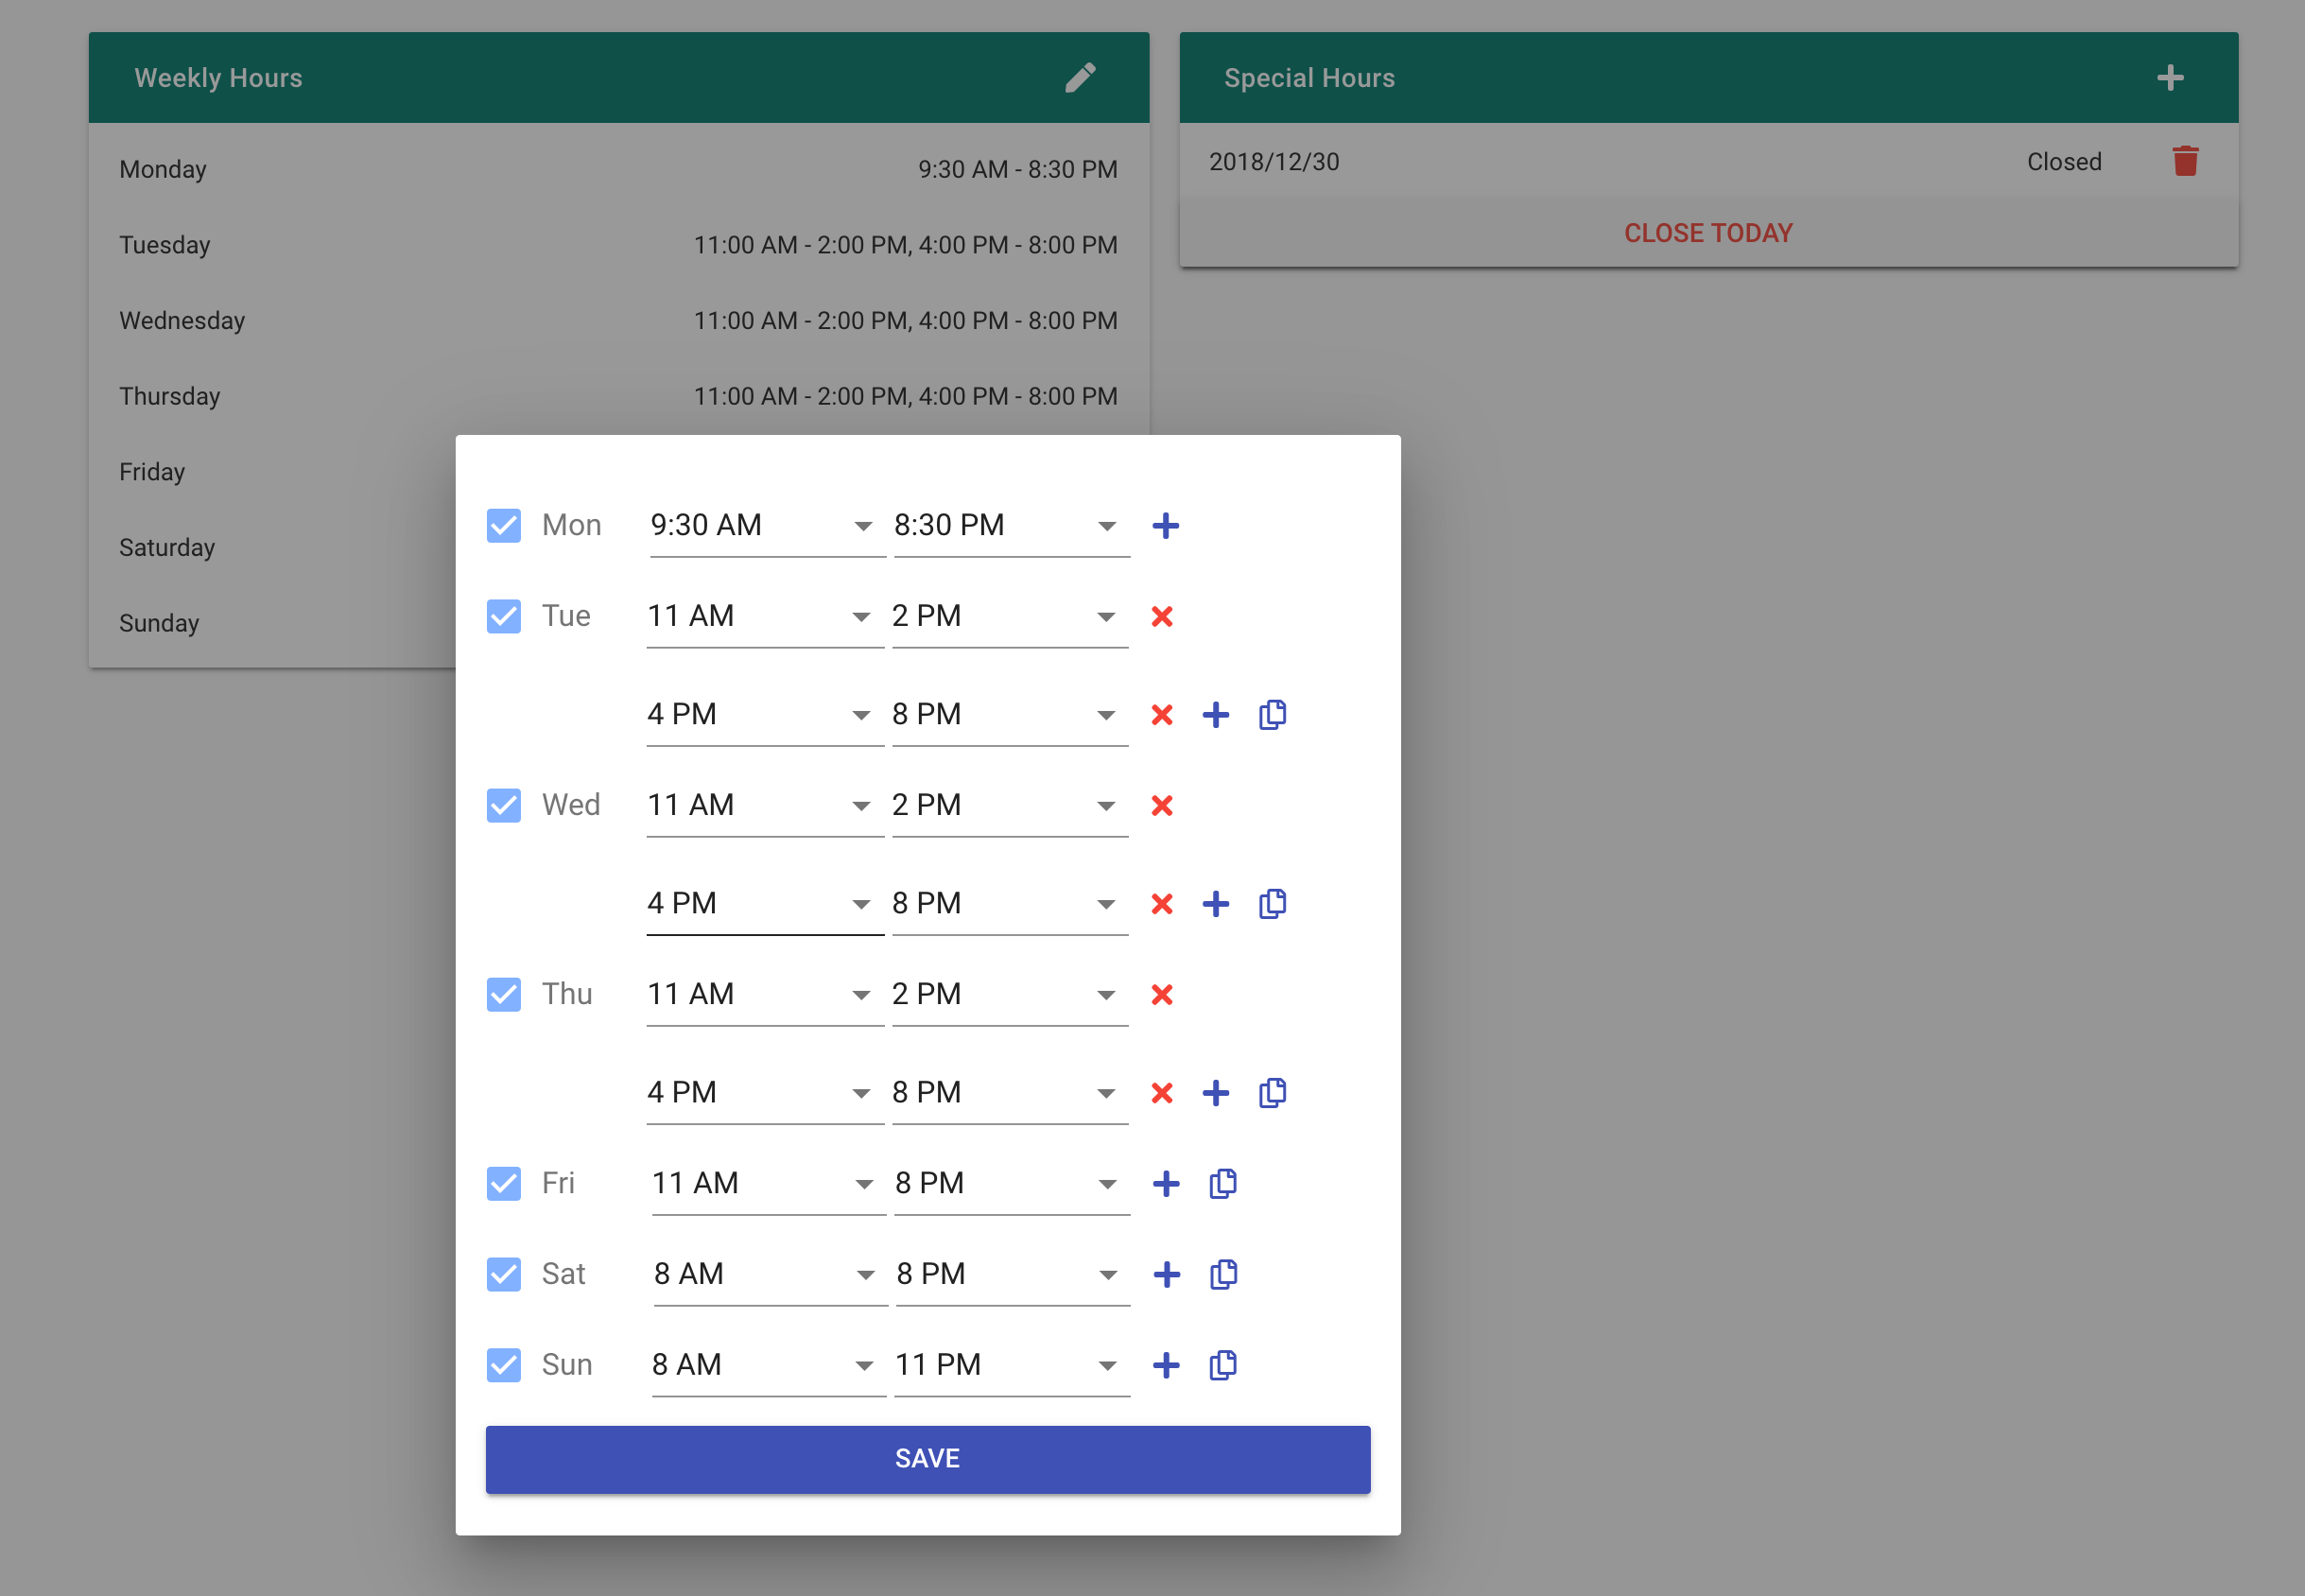
Business hours include Weekly Hours for regular schedules and Special Hours for holidays or special occasions.
Online orders can be made in allowed hours validated against both Weekly Hours and Special Hours.
The hours are only affecting the time window that customers can make online orders. It won't affect the functioning of the Point of Sale in the restaurants.
::: tip Update Special Hours for holidays and special events to avoid any mistakes :::
Manual
This is a manual for selflane
Create a Business
For desktop website
- Go to www.selflane.com
- Click the list icon on the upper left.
- Click Create a Business.
- Sign in with a Google account or create an account by entering an email and password and clicking Sign up.
- Verify your account and enter the 6-digit code sent via email.
- Enter your restaurant name, email, description, and address.
For iOS (iPhone and iPad)
- Open the Selflane app.
- Tap the More tab at the bottom right corner.
- Tap the My Businesses button at the center of the page.
- Sign in with a Google account or create an account by tapping Sign up on the top of the page. Enter an email and password.
- Verify your account and enter the 6-digit code sent via email.
- Enter your restaurant name, email, description, and address.
How to Manage and Arrange Tables
Desktop
- Click the list icon.
- Click My Businesses.
- Sign in using a Google account or your Selflane account.
- Under your restaurant name, click on either owner or manager. (NOTE: staff will not be able to create or arrange tables.)
- Scroll down and click on Tables, in the list on the left.
- Click the plus sign (+) in the upper right corner of Table box.
- Name the table (i.e. A1 or B2), enter the minimum and maximum number of occupants, and enter the room where the table is situated.
- Toggle the Online switch to allow customers to make online table reservations.
- Click Save.
iOS
- Open the Selflane app.
- Tap the ellipses for More at the bottom right corner.
- Tap Manage Business.
- Sign in using a Google account or your Selflane account.
- Tap on your restaurant.
- Tap Tables.
- Tap the plus sign (+) in the upper right corner to add a table.
- Name the table (i.e. A1 or B2), enter the minimum and maximum number of occupants, and enter the room where the table is situated.
- Toggle the Online switch to allow customers to make online table reservations.
- Tap Save, in the upper right corner.
To Arrange Tables
NOTE: Currently, you can only arrange tables using the Selflane POS app.
- Open the Selflane POS app.
- Tap your restaurant.
- Tap Seating, in the bottom of the screen.
- Tap Layout, in the upper right corner.
- Rearrange tables by dragging them with your finger.
How to Manage and Edit Vouchers
###iOS
- Open the Selflane app.
- Tap the ellipses for More at the bottom right corner.
- Tap Manage Business.
- Sign in using a Google account or your Selflane account.
- Tap on your restaurant.
- Tap Vouchers
- Tap the plus sign (+) in the upper right corner to add a voucher.
- Enter your customer’s name.
- Enter the discount amount.
- Tap Save in the upper right corner.
How to Manage Staff
Desktop
- Click the list icon.
- Click My Businesses.
- Sign in using a Google account or your Selflane account.
- Under your restaurant name, click on either owner or manager. (NOTE: staff will not be able to manage staff.)
- Scroll down and click on Manage Staff, in the list on the left.
- Click the plus sign (+) in the right side.
- Enter the staff member’s name, their alias (how their name prints on receipts), a passcode, and a phone number.
- Toggle Advanced Access and Access All Orders to control staff access to orders and back office functions.
- Under Role, choose from the dropdown menu to choose the staff member’s title.
- Set the hourly wage.
- Click Save.
iOS
- Open the Selflane app.
- Tap the ellipses for More at the bottom right corner.
- Tap Manage Business.
- Sign in using a Google account or your Selflane account.
- Tap on your restaurant.
- At the bottom of the screen, tap Manage.
- Tap Manage Staff.
- Enter the staff member’s name, their alias (how their name prints on receipts), a passcode, and a phone number.
- Under Roles, toggle the switches to choose the staff member’s title.
- Under Access, toggle Can Close Batch and Can Access All Orders to control staff access to orders and back office functions.
- Tap Save in the upper right corner.
My Businesses>Manage>Manage Staff
How to Pay Invoices
Desktop
- Click the list icon.
- Click My Businesses.
- Sign in using a Google account or your Selflane account.
- Under your restaurant name, click on either owner or manager. (NOTE: staff will not be able to create or arrange tables.)
- Scroll down and click on Invoices, in the list on the left.
- Click Add in the box to the right, to save a credit card to Selflane to pay invoices.
NOTE: Currently, you can only pay invoices through the Selflane website.
How to Take an Order (dine-in, to-go, or delivery)
Order through the POS app.
iOS
- Open the Selflane POS app.
- Tap on your restaurant.
- Tap Make Order.
- Under Configuration, tap Dine-in, Pickup, or Delivery.
- Tap the customer’s assigned Table.
- Enter number of seats customer needs.
- Adjust time if needed.
- Tap Menu in the left column to take the order.
- Tap dishes accordingly.
index: 1, sidebarDepth: 2
Tax Rates
Selflane allows you to define one or more tax rates and apply them to the orders.
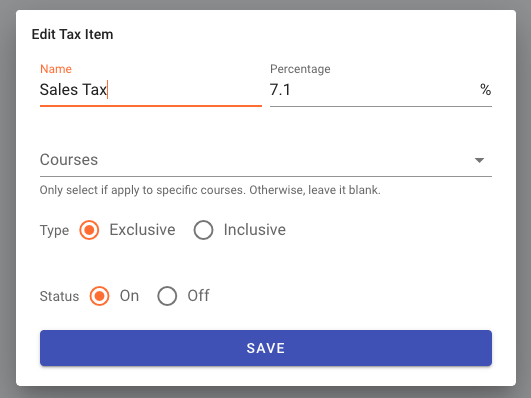
Creating tax rates
Name Tax name. Can be "Sales Tax", or specific name like "County Tax", "Acohol Tax"
Percentage Tax amount, between 0 and 100
Courses Optional. Only select if this tax is applied to specific courses.
Type Exclusive means add tax to items, inclusive means the percentage of tax is included in the price.
Status You can turn off a tax rate if it is temporary.
If a course has specific tax rates attached, other general taxes won't be applied to it.
Inclusive vs. exclusive tax
Tax rates can either be exclusive or inclusive. An exclusive tax is not included in the invoice subtotal, whereas an inclusive tax is.
The following table illustrates a 25% tax rate modifying the total amount due, depending on whether it’s exclusive or inclusive.
| TAX | Type | SUBTOTAL | TAX DUE | TOTAL |
|---|---|---|---|---|
| 25% | Exclusive | $5.00 | $1.25 | $6.25 ($5.00 + $1.25) |
| 25% | Inclusive | $5.00 | $1.00 (already included in the total) | $5.00 ($4.00 + $1.00) |
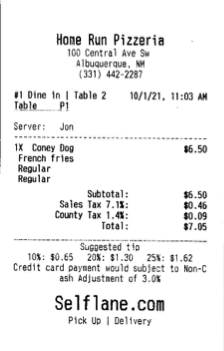
Receipt with Itemized Taxes
Please sort the taxes in your own order and they will be itemized in the printed receipt.
meta:
- name: keywords content: Restaurant Hours, Holiday Hours, Special Event Hours
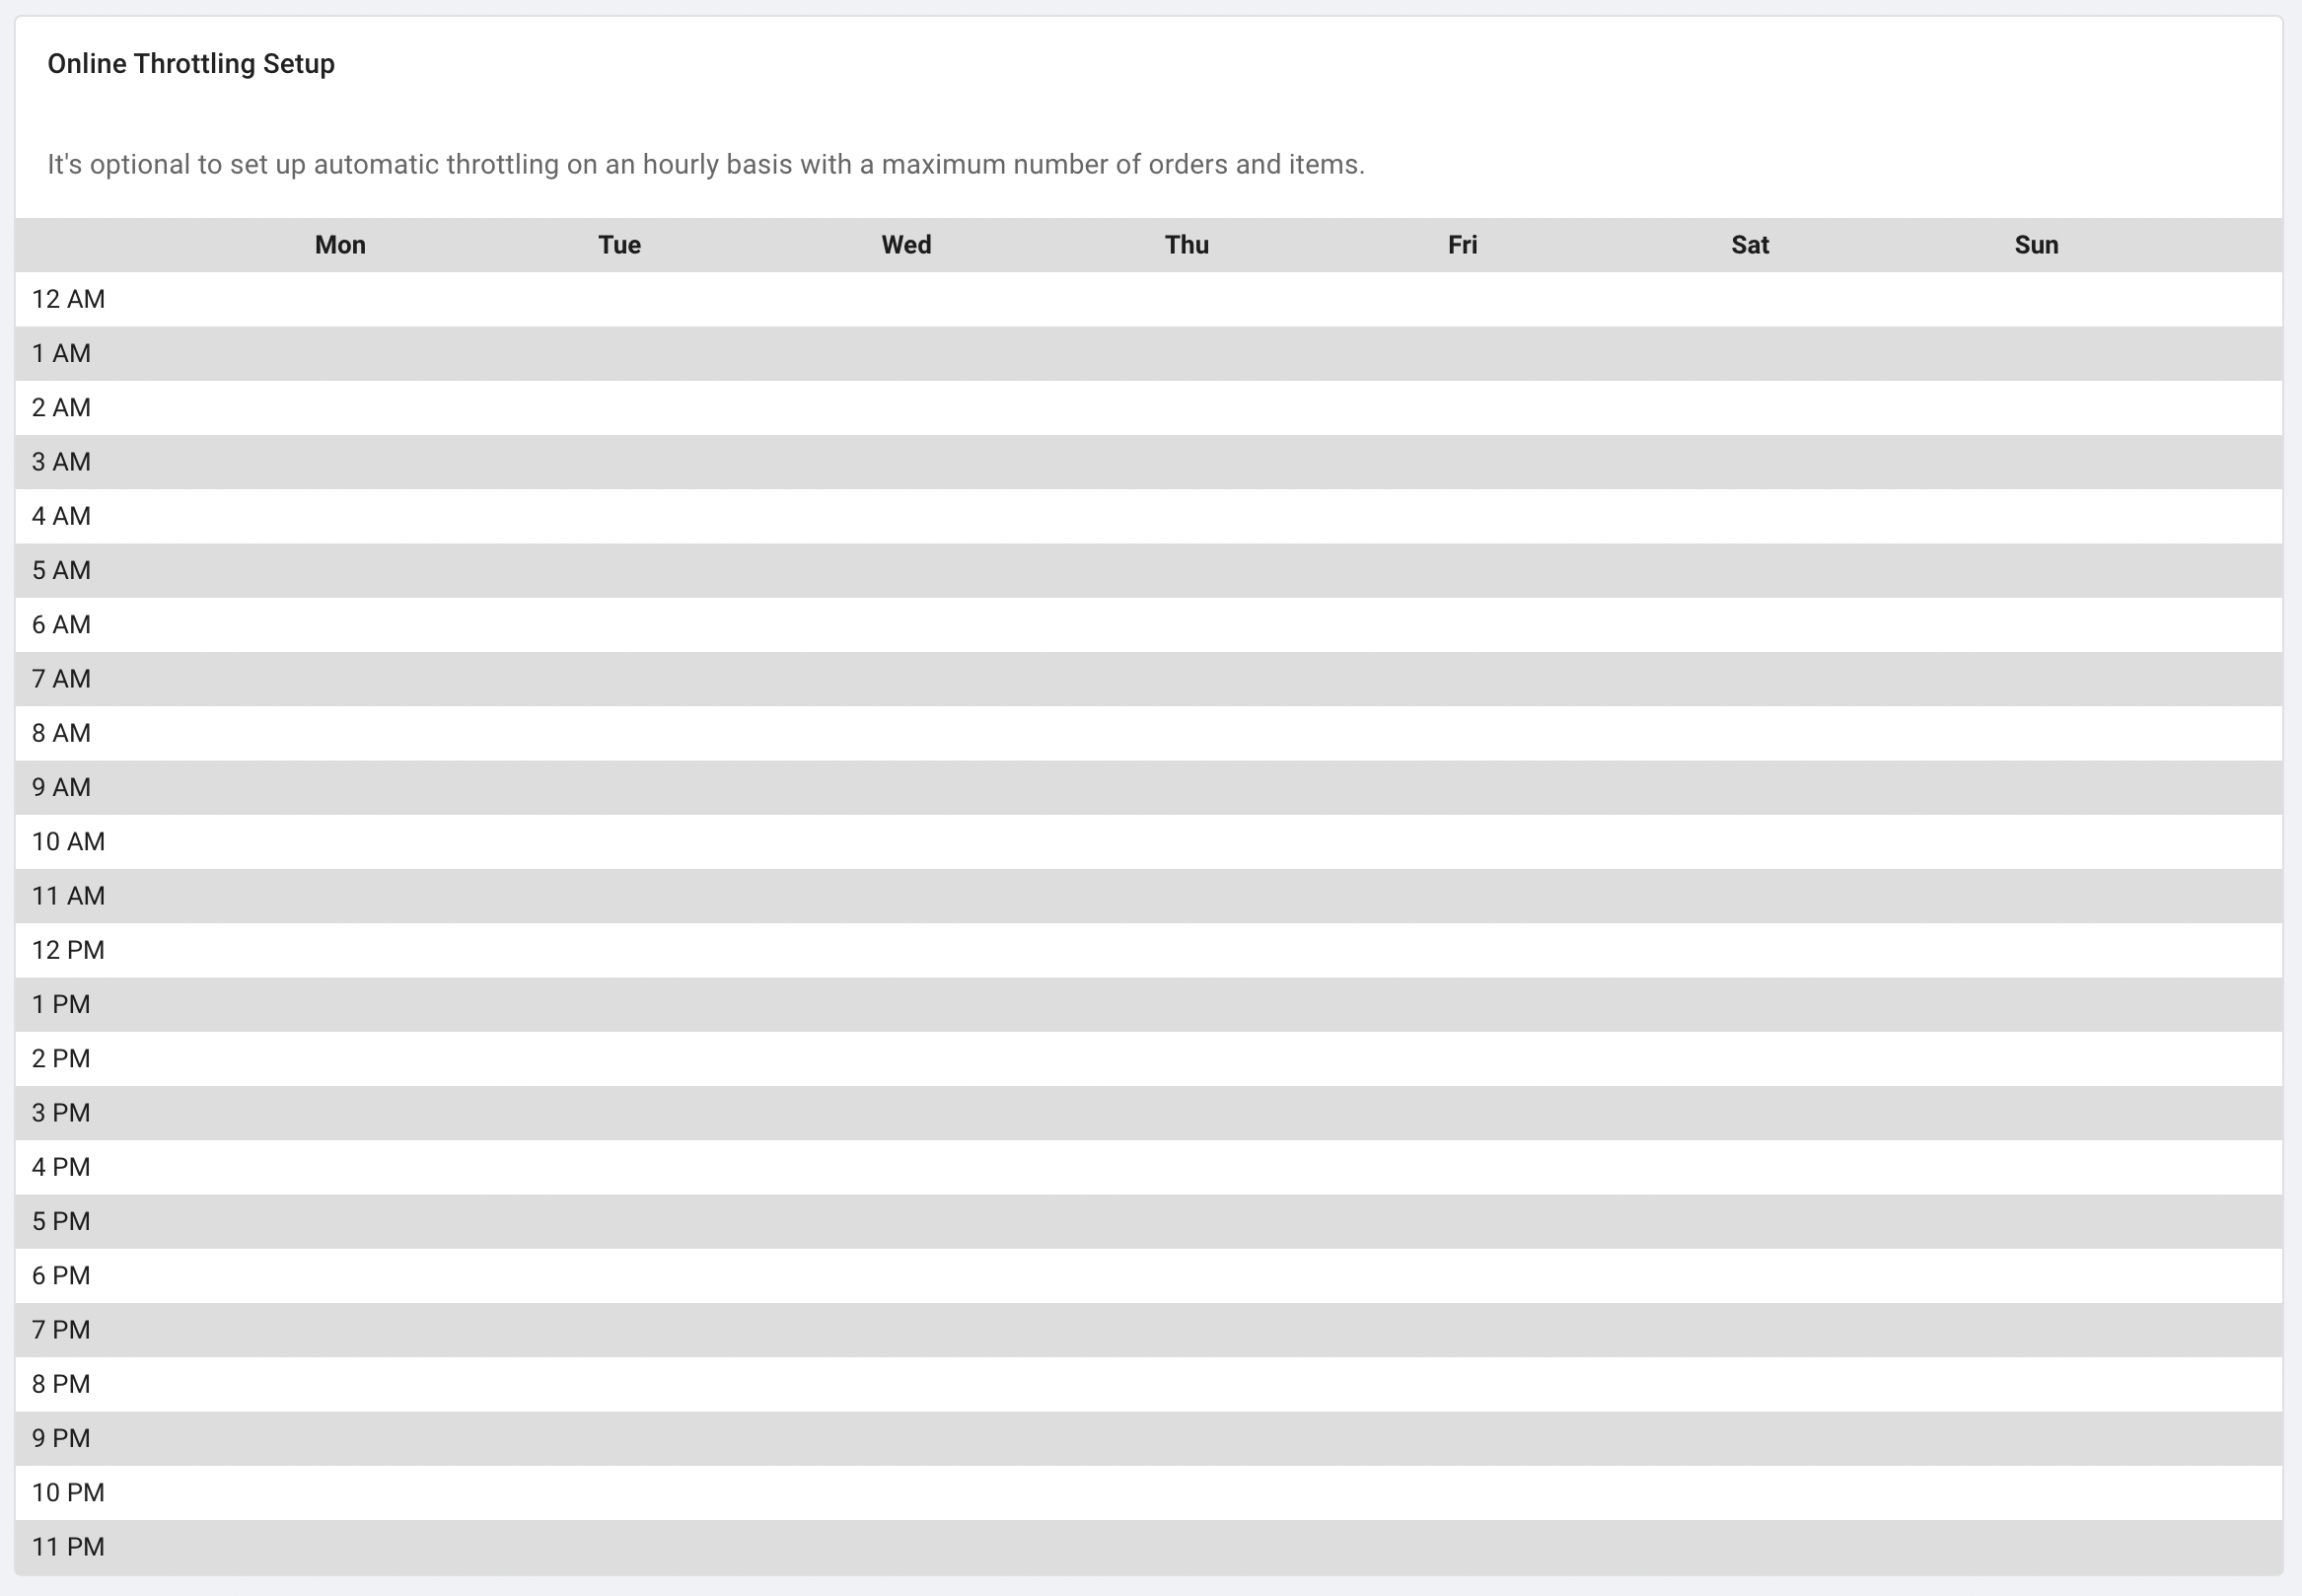
Order Throttling
A business usually has fixed capacities depending on the hours and number of employees. We build a throttling tool that allows you to allocate hourly capacities. With a capacity cap in place, you can feel at ease as the system will automatically handle peak hour ordering and prevent any surprise rushes.
Setting up a throttling mechanism is simple. Go to Profile -> Hours. You only need to set up capacity limits if necessary.
For example, a business opens from 11 AM to 9 PM every day. It gets busy during lunch hours and dinner hours. To prevent any overwhelming rushes during those peak hours, the owner can set up a cap at 12 PM, 5 PM, and 6 PM. You don't have to do anything that is during off-business hours. You also don't have to fill up every business hour.
- You can update the capacity at any time. It would be effective right away.
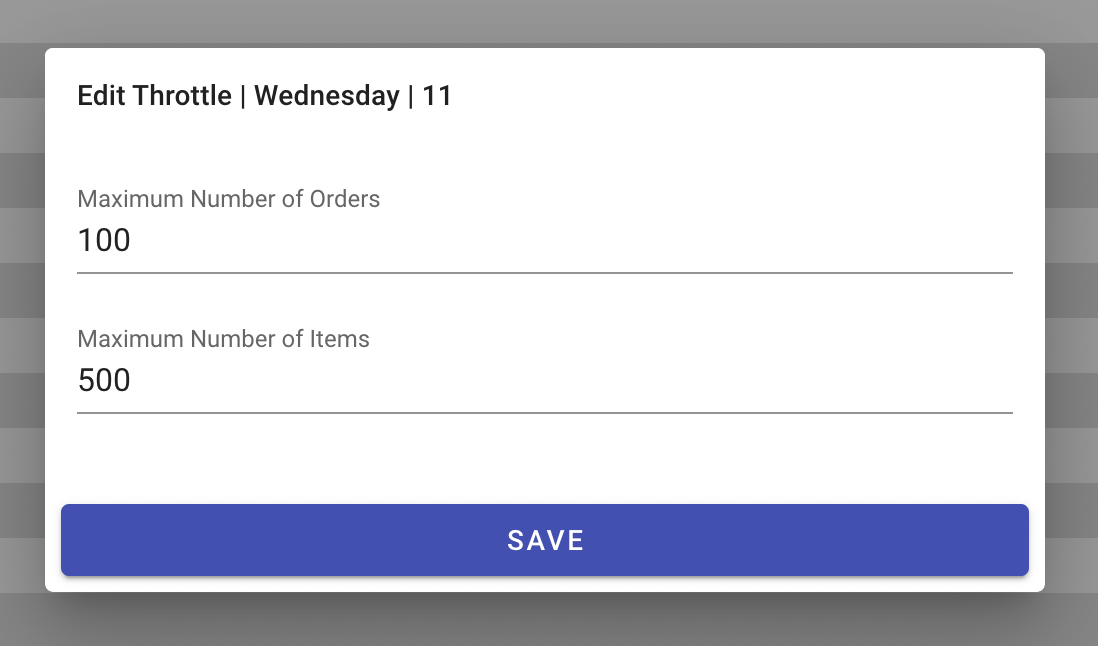
You need to put up both the maximum number of orders and items. When either of these criteria is passed, it will start to prevent any further order in that hour.
- We count orders and items put in both online and from the POS.
If you use our POS system, please consider capacity in terms of both in-house and online orders. Otherwise, the capacity is only for online orders.
Throttling Timetable and Form
meta:
- name: keywords content: Restaurant Hours, Holiday Hours, Special Event Hours
Delivery
A business can have it's self delivery options or use 3rd party deliveries. Please note that 3rd party delivery is available only in limited areas.
POS Changelog
POS Changelog
Questions?
Contact Sales.